Hello warlords! Rodge here from Saga Thorsday.
I recently got in on a little Saga action with a new (and incredibly awesome) group of guys! They actually live in my hometown, so this is an excellent development. Always keep your eyes peeled, people! You never know when you’re going to run into some underground Saga players!

This is Sam!
We rolled a d6 to determine a scenario from the original Dark Age Skirmishes rulebook and came up with Sacred Ground. We decided to use the Adepticon variation of this scenario, where the VP you gain from each piece is capped at the turn number. (So you can only get a single point from each piece on Turn 1, two points for each piece on turn 2, etc.) Although we’ve never met before, we both had heard of this variant and thought that this would lead to a closer and better game!

For lack of a big hill, we just played the center piece as open ground, even though it’s several rocky features strung together.
My Anglo-Saxon force pictured on the bottom of that picture was left to right:
- 12 Warriors
- Warrior Priest Father Gregorius
- 12 Warriors
- Warlord Aelfynn Ravenkiller
- 12 Levy
- 12 Levy
He does have good utility, though. The Bretwalda ability can make him a tough nut to crack. The big Saxon units also get the most benefit from his Blade that Punishes ability. These attacks are definitely welcome too, as the Saxon board trends towards defense.
Lastly, I just really like the symmetry of each warrior unit led by tough fighter! Simplifies my game plan.

From left to right on the Irish side, we have: 1 Curadh, 8 Warriors, 7 Hearthguard, Warlord

8 more warriors
and 8 mounted Hearthguard!

One last shot before battle!
I played Irish only once before at Adepticon and was thoroughly trounced! (Although I was using Anglo-Danes) With this scenario and faction, though, I was feeling pretty good! At least I had a few more bodies to absorb all those sticks flying my way!

First turn the Irish move up.
The mounted Hearthguard take a fatigue for a double activation to claim the center. (Just a reminder that we were playing it as open ground!) Dice run out, however, and Sam has to leave the forest in front of his line unclaimed.

My turn I stack my board for movement and shooting defense. In these shots, the Irish board will show what Sam actually has left on his board at the end of his turn and start of mine.

The masses move forward with the Levy on the far right double moving to claim the field (and, no doubt, scrounge for some seed)
On the Irish second turn, their foot warriors continue to surge forward. The mounted Hearthguard take a little breather on the center objective and the Sons of Dana begin their bloody work!

Although Sam stacked his shooting abilities, my Overlap Shields and Combat Pool Defense bonus mean only a single farmer drops. Whew!

My turn 2, I concentrate on levy activation and the inevitable counterattack! I did roll a Helmet so there were dice a plenty!

I double move the center Levy up to contest the middle objective. They are exposed to all sorts of Irish nastiness but I don’t want to fall behind in VP (and the Levy are accustomed to such hardships!)
My warriors are poised to counterattack if he gets too close with his foot troops or if he doesn’t pull back with the Hearthguards.


View from the Irish side!

Unsurprisingly, the Irish lay into the Levy bold enough to contest their Sacred Ground!
Numerous units and abilities are used, resulting in 9 dead farmers. I’m just glad a few made it through to gum up the works. (We’ll also need them for this year’s harvest yet!)

Couple things of note here at the end of the Irish turn.
The mounted Hearthguard chose to stay on the hill and the foot Hearthguard near the Warlord took a fatigue for activating twice. The rest of the Irish Warriors and Curadh are pretty far back in the woods or even at the starting line. The Men of Wessex smell opportunity...

In typical fashion, however, I fail to roll that rarest of Helmets. The bounty of last turn hath withered on the vine!
Although there is a good lesson here. I should have loaded up The Fyrd last turn when I had the Rares and just saved it for future turns. I knew that the real action was going to go down the following turn but decided to push my luck and I paid for it here.
In any case, I decide to go on the attack! (It's a battle after all!)
Also, I won’t be able to stand up to that shooting for long. I have to use most of my dice to get into position but do manage to power up the Warrior Priest and get a dice on Defenders of the Realm (probably my favorite ability on the board!)

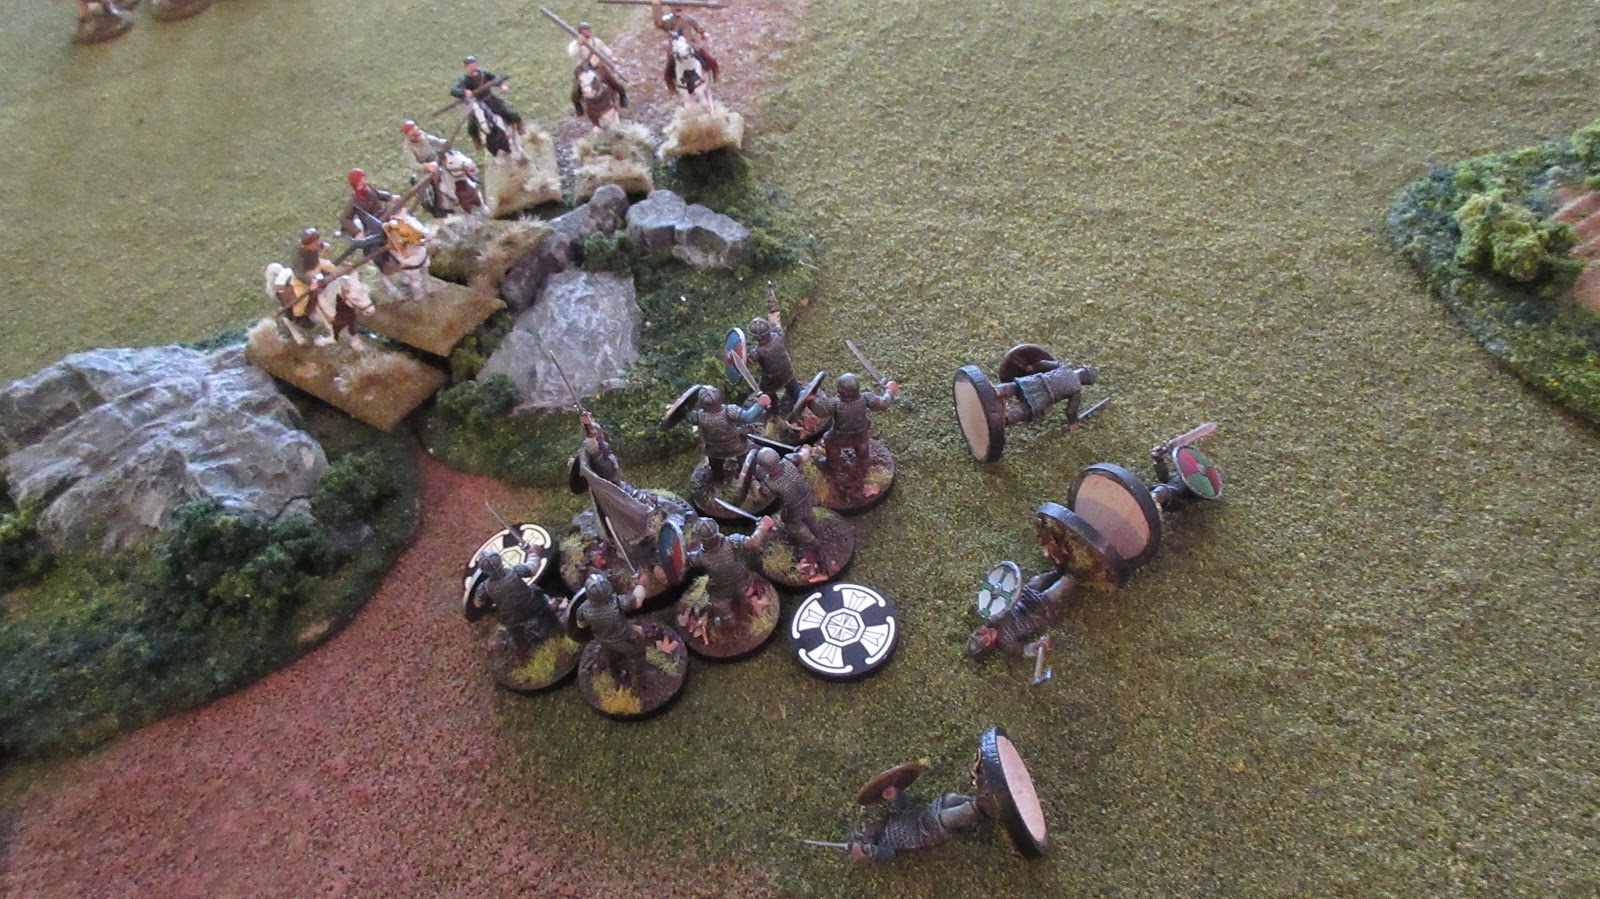
On my left, I double move the Warriors and Gregorius to go in against the fatigued Hearthguard.
With all the fatigues canceling out, it should be a “fair fight”, although I have numbers and religious fervor on my side. Generating 24 attacks (6 for Warrior Priest + 12 for Warriors + 6 more for The Blade That Punishes Side by Side bonus) against 14 coming back from the Irish Hearthguard, I’m feeling pretty good! I pop Defenders of the Realm for pure defense dice, so hopefully I can get the better end here!

A veteran Saga player will have no doubt sensed my overconfidence a mile away at this point.
The Gods of War give me 4 hits out of 24 (Needing 5s) while the Irish score 11 out of 14 (needing 4s). Good thing I loaded up on Defense dice!

On the right side, meanwhile, things are a bit trickier. My Walord, the Ravenkiller, would be in on the Mounted Hearthguard with a single move but his nearby warriors would not. Since I have to double move anyways, I move the warriors into range but towards my far right. The Irish Hearthguard are still in a crescent formation to better pummel my poor farmers, so I have the opportunity to engage with only a few of them.
After shuffling for that position, my warriors (now fatigued) and the Ravenkiller (fresh) wade into combat. Only 5 of the 8 Hearthguard get to fight and this one is a little more inconclusive. Sam uses the warrior's fatigue to make his Hearthguard harder to hit. After all is said and rolled, two Hearthguard go down to a single Anglo-Saxon warrior so this time it’s the Irish who have to fall back! I was expecting a few more casualties there, so was quite pleased with that result!

The lines at the end of Turn 3.
You can see the Saxons are starting to sweat with all those fatigue markers but we still have numbers in the middle. Both of Sam’s Hearthguard unit have a fatigue on them as well, although his Warlord is fresh. He’s got a few options at this point, let’s see what these Irish can do!
They’ll start by flinging some more sticks of course!
The Hearthguard move up and with a few Irish abilities juicing them up, they take down 4 warriors.
On the left side, Sam wants to get his Warlord and his Hearthguard into my warriors. Due to the size of his base and a couple of my farmers in the way (Doing their job!), he has to do a move behind his Hearthguard first, then go in. In the ensuing combat, I keep the fatigue on his warlord and we both use our trooper's fatigues to make each other easier to hit. We both desperately want to wipe the other guy out!

As a bonus, that wipeout adds a 3rd fatigue to the Irish Warlord.

My turn I plan to strike back while the Warlord is defenseless.
With my units depleted, I have no chance of generating bonus Saga dice. I have to make do with what I roll. I manage to activate the Blade that Punishes and Father Gregorius engages the Irish Warlord head to head (along with the last warrior.) Sam keeps all 5 of his Warlord's attacks. When asked if he wants to fight defensively, he simply states “We don’t do that here!” Loving these guys!

The gambit to take out Father Gregorius fails, however, and the old man is victorious! Although, that warrior that was with him is conspicuously absent...
Meanwhile on the right side of the battle...

The Ravenkiller and his retinue rest up quick and then pile back in. With only two defense dice from Defenders of the Realm, this is going to be dicey!

But the Saga dice gods favor the bold! The Hearthguard are completely wiped out! Even the Ravenkiller is shocked by the carnage!

Wow, that was a big turn for the Men of Wessex! We’re depleted but we hold the Sacred ground!
The Irish aren’t done yet, however! Despite being starved for Saga dice, Sam moves forward and actually leaving his Sacred Forest to fling some sticks at the Priest. Gregorius is still pretty nimble in his old age and deftly dodges them.
At this point, the Scenario is forcing Sam to gamble a bit. If he can quickly wipe out the Saxons on the hill, he'll hopefully score enough points in the end to claim a victory.


On my turn, I manage to roll a couple helmets but they’re pretty useless at this point! I ready up Gregorius for further action while the rest of the force takes a well needed rest.

Gregorius pushes back the Irish warriors, slaying two, but exposes himself to the Curadh. Although I have Bretwalda in reserve, hopefully this wasn’t a mistake!
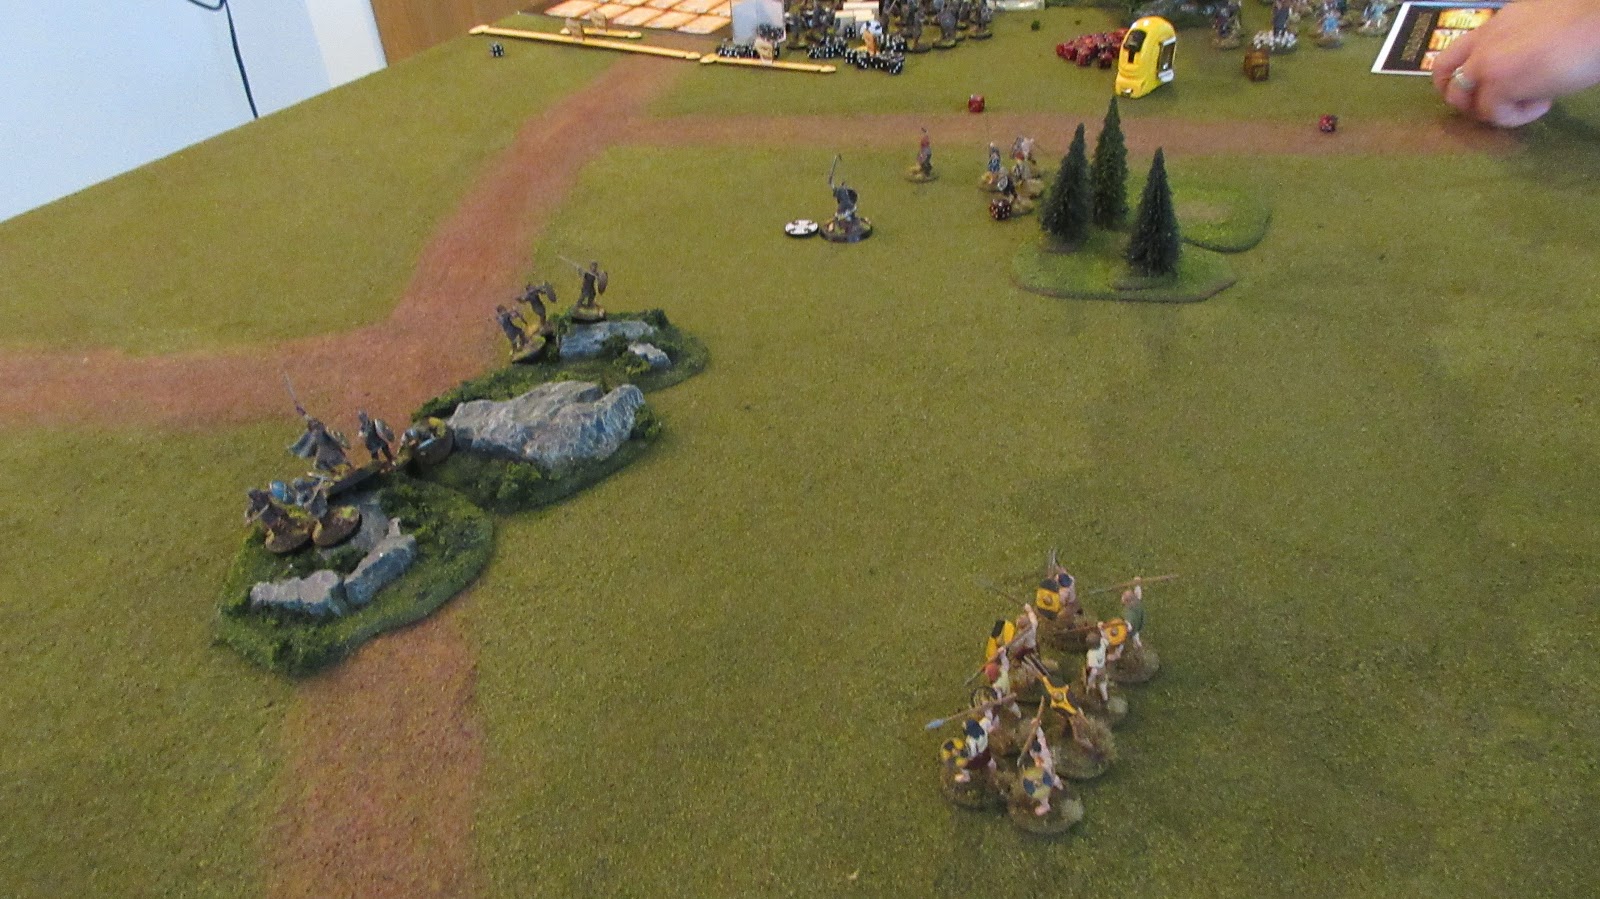
Crow’s eye view of the table. You can see Sam's other warrior unit is a fair ways out from the center.

On the following Irish turn, Sam once again calls upon the Sons of Dana to wheedle away at my VP lead. Four farmers are caught unawares before they can huddle up for protection.

Meanwhile, Father Gregorius successfully fends of the Curadh, who retreats to regroup.


Finally it’s just down to the Priest and Curadh!

Father Gregorius is victorious and secures the Sacred Forest for the Men of Wessex!
While Gregorius was taking care of business on the flank, there was yet a little action towards the center as the remaining Irish warriors press forward.

The Men of Wessex are thoroughly depleted as well, however, and the game ends with a staredown in the center!

We figured the always pragmatic Ravenkiller approached the now lordless Irish warriors and offered to settle them in Wessex lands. He took an awful loss in manpower and would rather he get a share of something rather than nothing from those lands!
* * *
Victory Points Totals
Turn 1 – Sam 01 – Rodge 01
Turn 2 – Sam 05 – Rodge 05
Turn 3 – Sam 11 – Rodge 11
Turn 4 – Sam 19 – Rodge 18
Turn 5 – Sam 19 – Rodge 26
Turn 6 – Sam 19 – Rodge 32
Turn 7 – Sam 23 – Rodge 44
Turn 8 – Sam 27 – Rodge 56
Wow, great game! Although the pure VPs indicate a solid victory, you can see it was far closer than that. I have to say this is rather typical for my Anglo-Saxons. When I win, it's just barely a win.
Overall, this game was a blast and Sam was a great opponent! He was very impressed with Gregorius and is now considering a Warrior Priest for his Irish as well!
Thanks to Monty for letting me post this on the Twin Cities Gamer blog. He is helping me out big time with my upcoming review of the Spanish Battle Board next Saga Thorsday and I wanted to return the favor!
Catch you guys next time!
-Rodge
Hi Sam!
ReplyDeletegreat work with these report!
What a stunning report!
ReplyDeleteGreat report and wonderful photos!
ReplyDeleteAwesome to hear you found some SAGA players in your neck of the WiscoWoods
ReplyDeleteGreat write up, thanks. Will check out the youtube channel!
ReplyDeleteI only have the basic rules. Which book are rules for priests in?
Thanks for reading, guys!
ReplyDeleteThe priest rules are in the Crescent and Cross book. Although, they were FAQ'd last summer to tone a couple of 'em down a bit. The best place to find the current rules is actually the Studio Tomahawk website (recently back up after it was hacked). They have a .pdf with the current Priest rules (as well as other goodies!)
thank you
ReplyDelete