Pages

Friday, January 25, 2013

The Sultan Smiles! A Maurice AAR...

Maurice is a big hit in our group, so much so that we're into our 2nd campaign since August.  There are many things to love about the game but the campaign rules are genius. The campaign allows a player to:
  • Write a back story for your army, leader and war if you like.  
  • Choose the kind of army you run by purchasing National Advantages.  
  • Deliver smack between battles and change up sides frequently. 
  • Write clever AARs in character to share with the rest of the players.  
The campaign also gives a narrative, energy and game to game results that are absent from a one off match.  Our group is so hooked that we've managed a game every 2-3 weeks.  Being a family man, it's no easy task to sneak out the door for my games.  When my wife pointed out I was gaming two weekends in a row, I replied "but this is a campaign game" and it worked!

I was playing Hugh in this match and by the way, Hugh had never lost a campaign game.  To prepare for my big showdown,  I read the rules cover to cover and filled up a notebook with tips and ideas.  I also got practice games in and brainstormed with my sparring partners.  So, how did my training and  hard work pay out?

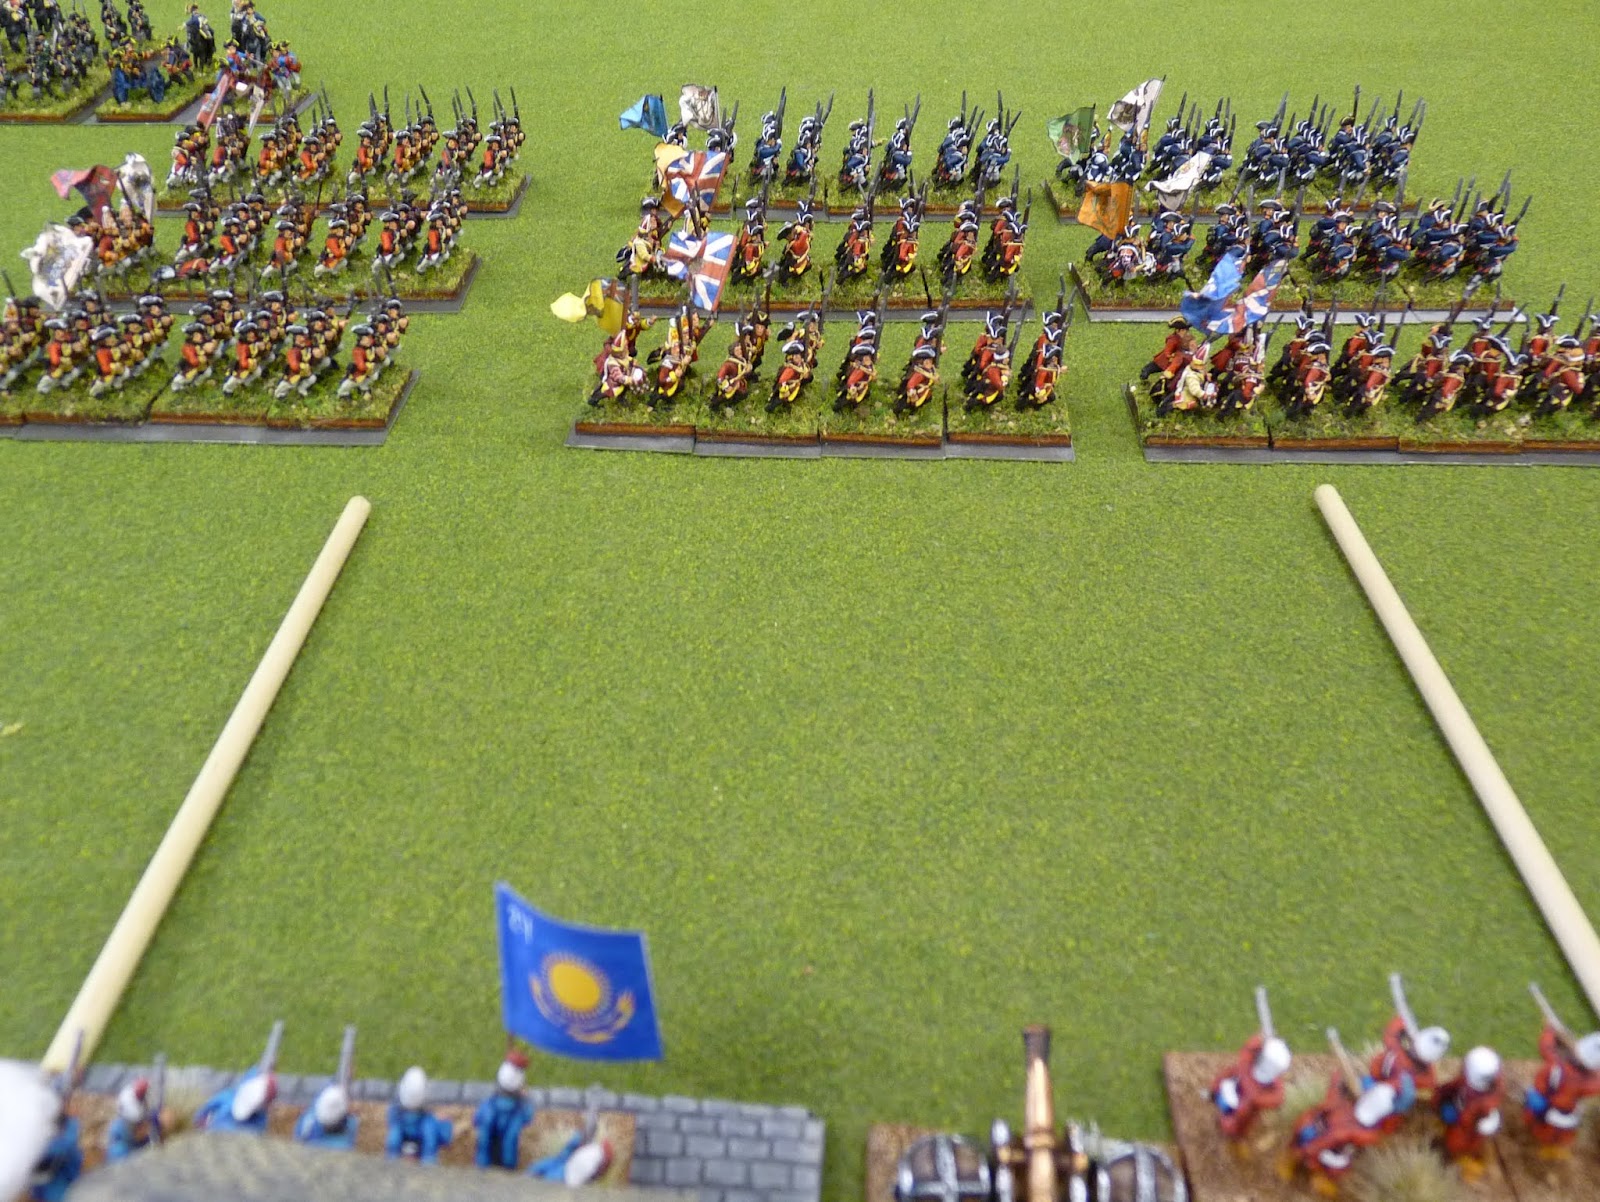
The game had a promising start when I won the scouting role and was able to choose to defend.  6 pieces of terrain went down and Hugh made a point to drop his terrain in my deployment zone to mess me up.  The village, marsh and woods cut my deployment zone in half so I shoehorned my army into the right half of the board.
In addition to being a stone cold killer, Hugh has a spectacular Coalition army made up of French and British troops.  A 00 or 000 brush was burned up painting these handsome lads and all of their piping.
 
My Ottomans wedged themselves into a double line between the two villages while my cavalry held in reserve.  The boys in red are my Guard units, The Sultan's Own.
In the early game, Hugh swung his army out in parade formation and formed up just outside of musket range.  I declined to bombard with  my cannons in order to load up on cards.  That turned out to be a wise decision indeed!
If you're going to knock off the Big Dog, you need some luck and luck was with me in the early game.  I pulled 3 Event cards that I quickly put to use.  First, I played "That's Not on the Map!" to drop a marsh in his line of attack on the village. Then I played "Confusion" to march one of his Guard units out of line and into the marsh in canister range of my cannon.  Then I played "Heat of the Battle" to charge his weakened Guard unit into two units of The Sultan's Own, destroying the flower of his army.    
These 3 event cards put Hugh back on his heels.  He pulled his infantry back to reorder and realign.  At this point, I was tempted to come out of my defensive position and try to grab a decisive victory but I resisted.  
Hugh made a valiant attempt attempt to work my flank but the woods and my reserves on the other side made sure his push came to naught.

In the spirit of a gentlemen soldier, I offered Hugh terms near the game's end.  In perfect character, Hugh replied sharply that he had no interest in terms but he was willing to accept my surrender! 

Night fell and with it came a a minor Ottoman victory with an epic point for the carnage inflicted on the infidels!  Two games into the campaign, the village bells rang to celebrate the amazing fact that Sultan al-Adin is undefeated! !  

Sunday, January 20, 2013

36 Knights! - last of the Hungarian heraldry

During the medieval era, armor was sometimes "blackened" in order to protect it from rust.  Blackening consisted of coating the armor with oil and burning it off or boiling the armor in oil until the oil cooked into the steel and then burning off the excess. Armor which is painted or lacquered black gives the same visual and also provides some anti-rust protection as well.

Thanks to a combination of Google and a fellow blogger in Turkey, I found the artwork of Hungarian knights below.  In each instance, the artist chose to show portray Hungarian knights in blackened armor.  It's up to us to guess whether it was painted, lacquered or blackened on!

As I discovered when painting the Royal Banderium, painting black knights in 15mm is a tricky business.  My version consisted of priming the knights black and then painting them with a Vallejo Gunmetal + Black mix.  I then drybrushed lightly with Gunmetal.  I was sorely temped to work up the brightness from there but that would defeat the point of painting black(ish) knights!

Painting heraldry consisted of me clicking through a Hungarian website until I found an icon I could paint.  Then I'd wheel my chair over to the painting table to do paint it, one shield at a time.  Underneath those shields are a few notable failures.  Hats off to you fellows who paint medieval armies and heraldry exclusively!


Once I started basing these up, I discovered that swords and lances covered up the shield of the figures to the right, obscuring a portion of the effort.  Arg!  That would not be a problem with Impetus basing!


All Essex figs.  Commanders and camp to finish this project up and then, it's Saga time!

Sunday, January 13, 2013

Heraldry - Szeklers Style!

The Szeklers were a key component of the Hungarian Black Army, providing them with thousands of lance and archer armed horsemen to defend against the encroaching Ottoman Empire.  These superb horsemen were the perfect foil to the Ottoman Akinjis & Timariot horsemen as both sides could employ shoot and scoot tactics.

Thanks to Google Chrome's translator feature, I was able to find a Hungarian website featuring medieval Szeklers heraldry HERE which were put to use below.

There are a few that didn't turn out well but my rule for painting heraldry is, "if it looks better than a blank shield, move on!"  I did sprinkle in some geometric patters just to keep this from taking all winter.

I primed horse and rider in the horse's base color with Army Painter colored primer.  Then I washed the horse in Devlon Mud and subsequently painted the highlight color onto the horse very neatly, taking care not to slop onto the tack.  That way, I could paint the tack in a highlight color and the shadowing from the Devlon Mud remained intact.  This is much easier than painting the tack in black and then painting a color over the top of the black.  I'll be keeping this trick in my stable!


The number of photos is a bit indulgent but with 48 figures in 4 units of 12, I don't want to rush these fellows out the door. In Field of Glory, 4 units of Superior sword-armed horse archers will be Death in the Saddle.  I can't wait to get them on the table and demonstrate it. Brandt, get rrrready to rrrumble!

Sunday, January 6, 2013

In the Saddle-Hungarian Light Horse

The challenge to painting a Later Hungarian army is that once you've finished your foot troops, you've done the easy part.  The cavalry contingent is 100+ strong with shields, heraldry and knights.  The upside is that Essex horse are a joy to paint, even when you get to  #99.

Hungarian Light Horse: Hungarian light horse is nothing special in the Field of Glory Hungarian army list but it is a mandatory pick.   Much like the Union cavalry at the start of the ACW, I suspect these fellows felt the pangs of being second best as the Szeklers light horse teased or even mocked them.


Szeklers Light Horse:  Armed with bow and sword, these superior horsemen will be hard pressed to find their equal.  They'll generally outclass the enemy light horse.  +5 points for the stylish caps with a feather in them!


I think the sand colored ballast helps the horse shine.  I used 4 or 5 shades of brown with these and the light basing lets the various browns shine through.   

Wednesday, January 2, 2013

Looking back, looking forward

Looking back, I keep a running tally of the figures I paint based on troop type, scale and project. In 2012, I painted 1,453 figures in 15mmTo achieve this mark, I've forsaken almost all of my other hobbies and interests for painting. A man can only serve one Master and he calls me loudest from the painting table!

Impetus 
Mid-Republican army: 217
Pontic army: 162
Gallic army: 206

Maurice
Ottomans: 164

Field of Glory 
Ancient Spanish army: 262
Later Hungarian army v2: 218
Later Hungarian commission: 110
Ancients odds and ends: 90 

Looking forward, I took the Saga plunge.  A fellow was dumping his Saga projects on Bartertown and I snapped them up.  By my count, it's enough Normans and Vikings to paint up 3 warbands for each side.  

Over Christmas break, I started with the plastic GB Vikings.  This is old news for many of you but the Gripping Beast plastic Vikings are fantastic.  Great models, lots of options and a great value with 44 figures costing only $32.

I've limited the color palette and intensity for the first batch of Vikings. I'm going to have to decide whether to use LMBS shield transfers or paint shields from scratch.  I've got 200+ figures to paint so maybe I'll put the time into figures and not shields.  I also grabbed a tin of Army Painter Strong dip.  I've never done AP dip so for one of the warbands, I'll give this a try as well.    

The 4Ground Saxon hovel has been reviewed on other blogs but I thought I'd give this excellent product a quick shout out.  The kit is fully assembled in less than 30 minutes!  I'll be getting a few more of these.  

What new projects have you got under way or queued for 2013?  

Saturday, December 29, 2012

Hungarian heraldry-can you spot the fake?

Up next are the Clipeati and Armati.   Clipeati were armored footmen equipped with enormous shields called pavises.  The Clipeati formed a shield wall from which Hungarian infantry could fight or hide behind.  Crossbowmen and handgunners probably operated behind this shield wall.

It helps to have a large flat surface like these pavises when painting heraldry in 15mm.  I used watered down grey or brown to block out the shape of the icon.  Then I filled up the base color and worked up successive highlights.  When the icon was finished, I highlighted the surrounding color one last time to clean up and bring visual interest.  It is a bit of a trial.  You want your paints thinned so that you don't get too much build up but then again, too thin and it runs.  Images with too much detail just doesn't work in this scale.  For example, the severed eagle's leg with an arrow looked great on the web but took forever to paint. Ultimately, it was visually dwarfed by the much simpler egret, goose and goblet heraldry.  I should have just painted all white geese on black shields!

I found my heraldry at a Hungarian website.   Thanks to Chrome's translator, I was able to click through and find what I needed!  I can vouch for the accuracy of the heraldry on the shields above, save one.  As I got to the finish line, I decided to have a bit of fun on one pavise.  +5 points to the first reader who can spot it!

Armati were the armored footmen who fought with the Clipeati. It is not clear what the Armati were armed with but it is assumed they used pole arms for fighting from, over and around the Clipeati pavises.  Overall, I'm pleased with how this mix of figures turned out together.  

Wednesday, December 26, 2012

Mustering the Lights for Corvinus' Black Army

Santa brought me a new Daylight Triple Bright Lamp,  Despite the absence of sunlight, I can start taking pictures and posting King Matthias Corvinus of Hungary and his Black Army.  This is a major upgrade over the workshop light I've been using.  Here's hoping it'll pay dividends with photography and painting in 2013!  

I pitched into the Later Hungarian army v2 project wanting to change my painting and basing style. Some speculate that the Black Army was given its moniker based on their black armor panoply.   If any readers have an opinion on this point, I'd love to hear it!  I experimented with black but as always, straight black in 15mm is a problem visually. I've settled for working black in as much as possible, including the base coat.  From foot soldier to knight, armor will be very, very dark. 

Archers:  I started with a black and white livery but that wasn't working on account of the fur coats.  The very fine detail on these Essex figures made dry brushing a challenge.  Sharp-eyed readers will note the ballast is a change-up from what I usually use.  It's probably a touch too light but with an army composed of 50% cavalry, it'll pay dividends with the 100+ horses in various shades of brown.  


Handgunners:   When I look at these fellows, I'm thinking "Killer Bees."  It doesn't come through in the photos but the yellow triad pops nicely on the tabletop.  


Crossbowmen:  The camera shows all sins and I see I forgot to put a highlight on the quiver case!  D'oh! I do like these Essex poses though.

Next week, I'll post on the heaven and hell that is painting heraldry in 15mm.  With  persistence and some luck, I managed to find a website with medieval Szekler heraldry.  

Tuesday, December 18, 2012

Hungarian project - old dog, meet new tricks

For my Black Army of Hungary project, I'm changing things up.  I've got a system for basing and painting that I use faithfully on every army.  This time, I've decided to look for ways to do things differently. Experiment.  Change it up.  Right out of the gates, I'm having doubts. I've suppressed them by telling myself I can't judge the changes until it all comes together at the finish line.  But I judge. And worry. After all, I'm an old dog.  
Please lord, don't let the red devil kill me in my sleep.  
I've got 100+ foot and 100+ mounted figures to paint.  Almost half of the figures have shields. To scratch-paint heraldry on this many shields, I've got to find ways to save time.

Glue Gun:  First up is a trick I learned from Lurkio, 15mm modeler and painter extraordinaire.  I dug up an old glue gun and I'm hot gluing the cavalry to popsicle sticks. If you've painted Essex horse, you know how much time this'll save. Essex horses are exquisite, my favorite in 15mm, but their bases are easily bent or twisted.  That makes it nearly impossible to put a spot of PVA glue down and call it good.  The trick with the glue gun is to have the figure in hand and press hard  right after the glue goes down. One press and no fiddling to make the bases flat and figures stand up straight.


Army Painter colored primer:  Though quite pricey, I grabbed a bunch of Army Painter colored primers which I'll use to full effect. By priming a strip of mounted figures with a variety of browns,  black or grey, I'll have eliminated the step of blocking in the primary color of the horse.  I'll use a heavy wash over the blocked color and work detail and a highlight in when I paint the tack.  The beauty of this technique is that you get shadowing similar to black lining without the difficulty of painting over blackened tack.

Glue Man to Horse:  I've always painted riders separately from their mount but this time, I'm gluing the figure to the horse prior to priming to save time.  For many poses, Essex has already done this for me!  I don't want to work up from a variety of basecoat colors so I'll go over all riders with black.  The black shadows the hard-to-paint places between the rider and his mount.  And it'll lend itself to a darker effect that I'm looking for in my Black Army.
Since I'm using black on all the riders, I'll  paint faces with black plus flesh combo.  At 3 feet + viewing , it looks quite good in 15mm.

Army Painter colored primer in action.  
Flock it all:  I'm also changing up my flocking.  I once made the mistake of using too dark a color in my basing, which resulted in my cavalry being swallowed up by the color of the bases.  I found a very light colored Woodland Scenic ballast called Buff.  It is so light it's kind of freaking me out.  I'm going to stick with it because it should pay out with all of the cavalry & the variations of brown I'll use in painting them. I've had to remind myself that the point of basing is to showcase the figures. If the point of the basing was to realistically display ground cover, I'd use the "all green"  flocking method.  This one has a serious downside if I hate it at the finish line.

Accept feedback:  For me, painting is a quiet, solitary experience.  Some of you fellows belong to painting clubs and for you, painting is a social event. I've even heard of painters who paint via webcam just to get conversation and feedback as they go.  When I mentioned this idea to my family, they thought webcam painting was a little over the top.  I should point out that my kids are teens and thus, my very exsistence is a bit of an embarrasment to them!

For now, I'll settle for sharing photos.  My friend Gilles already pointed out some of my work was a bit dark.  I knew it to be true but I needed to hear it from someone else before going back and redoing highlights a tone higher. In 15mm, as in life, you just can't be subtle!

Monday, December 10, 2012

Going Gallic

Closing the book on my Gallic project, I'm compelled to share a True Story (TM) of my youth.  It seems like a satisfactory exclamation point to the topic, so here it goes.

After graduating from High School, my friends and I spent our summer nights hanging out before we went our separate ways.  In Phoenix, Arizona, homes often have a swimming pool on account of the oppressive desert heat. Being teens, we chose to hang out at the house/pool with absentee parents. On this Saturday night,we'd gotten together for a swim party.  Us guys were in the pool and the girls were outside of it, hair and makeup neat, paying us no attention at all.  Our ringleader Jim called us boys together in the deep end and as we tread water, he said softly “On the count of 3, pull off your swimsuits and wave then at the girls!” 

Off went the countdown, “1, 2… 3!!!” Off came my swimsuit and I waved mine wildly at the girls.  Then it hit me, mine was the only one in the air. Before I could comprehend the depths of the treachery I was about to suffer, I was dunked and held under water while my suit was ripped from my hand.  By the time I was allowed up for air, Jim was out of the pool with my suit.  The rest of the guys followed him, hooting and hollering as they paraded my swimsuit through the party to a large tree.  There they hung it from the lowest branch with great ceremony and insults to my intelligence. 

I was straight as an arrow back then but even an arrow bends when enough pressure is applied.  I swam to the edge of the pool and panicked.  Everyone was laughing at me.  They wanted me to beg, no, plead for my swimsuit back.  I knew they wouldn't soon relent.  No, they’d drag the joke out and make me suffer.  The pressure to act grew with the taunts and staring.  I had to put an end to their game. Without fully understanding it at the time, I decided to go Gallic. 
Roman dogs, give me back MY swimsuit!!!  
In a single motion, I lifted myself up out of the pool. I did not run.  I did not trot.  I made no attempt to hide my nakedness. I strode calmly through the crowd with my head up and eyes straight ahead.  I walked as if I were wearing pants.  I knew I could show no weakness, fear or shame.  And it worked.  As soon as I was out of the pool, the laughter and taunts stopped.  The crowd watched in stunned silence as I walked to the tree, pulled my suit down and put them on as as if I were dressing in the privacy of my bedroom.  This was NOT the way the prank was supposed to play out.  Game over. While the long walk is burnished into my memory, I can't remember anything from the rest of that night.  

Livy recorded that the Celts of Asia Minor fought naked: "The Insubres and the Boii wore trousers and light cloaks, but the Gaesatae, in their love of glory and defiant spirit, had thrown off their garments and taken up their position in front of the whole army naked and wearing nothing but their arms... The appearance of these naked warriors was a terrifying spectacle, for they were all men of splendid physique and in the prime of life."

Once in my lifetime, I too was a terrifying spectacle.  Never before or since have I done anything remotely like this.  If surrounded, pressed and hounded by my enemies, I know what to do.  Show no fear, stand tall and go Gallic!  And of course, pants optional!