Pages

Showing posts with label AAR. Show all posts

Saturday, November 26, 2011

The Sultan steps up

I finally got my Later Ottoman Turks on the tabletop against Al's Later Serbian army today.  Al's girlfriend Genna was co-running the Serbs and they made a great team! I couldn't help but notice more people approached us about our game than usual.  Coincidence?  I don't think so!

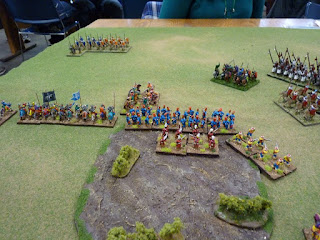
The Serbian army was knight heavy with cavalry, loads of lancer armed light horse and a single foot unit of medium archers.  My army was built around Janissary with a good deal of foot troops in support. I knew that if I didn't play this carefully, Al would roll me right off the table. My first break came when I won initiative and was able to select Hilly as my terrain choice.  I put down 2 brush and 3 steep hills to give my foot troops somewhere to hide from Al's knights. 
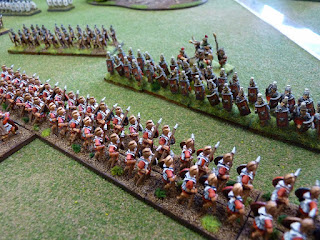
My Serbian Ally knights getting ready to go against...Serbs. 

Al put his knights down in the center.  I knew I'd get overpowered there so I deployed heavily on the flanks and left a screening force in the center.  In the early game, all the action was on the flanks while the knight block contemplated its options.   I pushed my Janissary up to secure the brush on the left flank and the steep hill on the right.  I was hoping that the difficult terrain would make it impossible for Al and Genna to send  knights in against them.  I hoped to pour archer fire down into the center of the board or in the alternate, support my left and right flanking maneuvers.

One of the great things about this Ottoman army is that everything except the Serbian Knights and the camp shoots.  For the first half of the game, I couldn't hit anything.  I did make good progress pushing both the left and right flanks out.  I realized if I ventured too far out, the Serbian knight block would crush me.  That's why I was content to stand pat on my left flank with a defensive line built in the brush.
On my right, I pushed forward into his Al's Light Horse. With my knights in tow, it was slow going.  Even worse, lance armed Serbian Lights chewed through a battlegroup of Akinjis in a single turn and then sacked my camp. Ouch!  4 quick points to my opponent!
Al saw an opportunity and pitched into my left flank in the brush.  His lance armed Serbian Lights went into my Janissary Handgunners and a block of knights went into the Janissary medium foot (in blue). The poor terrain and some good dicing on my part resulted in a flurry of disrupted markers for the Serbians.  While I could not hit a thing in the first half of the game, my archery fire was accurate in the second half.
The game was decided in a place I'll call the "Bloody Angle." The Serbs had me in a pinch, literally and figuratively.  If the Serbian Lights broke my handgunners, they'd sweep in on the flank of my Jannisary.  If the Serbian Knights broke the janissary, they'd sweep the handgunners. This melee ground on out over 3 or 4 turns. 
At a crucial point, my Janissary wavered and went disrupted. I then lost badly in melee and had to make a morale check with a death roll.  I needed a good roll with higher being better.  
Yes!  At turns end, the Jannisary rallied back from disruption.  The knights were neutralized and the Lights broke. On the far right flank, I'd pushed through the light cavalry screen and was a turn away from sacking the camp. Game called with my very first win with the Turks! 
This fast-paced game was a complete change of pace from running my Gallic or Carthaginian heavy foot armies.  It was interesting enough that a couple of people pulled up chairs and watched the second half.  It was also by far the best game I've played and of course it didn't hurt that I made some good rolls.  I'm really looking forward to throwing my Turks against Scott's Mongol horde and eventually, my in-progress Hungarian army as well. 

Saturday, October 22, 2011

Romans to the front, allies to the rear

Plans to field my Ottoman Turks today were delayed due to a lack of medieval opponents. Instead, I brought out my Mid Republican Roman army for the very first time. To get in the Roman spirit,  I'd planned to bring a chaise lounge down to the Source and bark commands while reclining & dining on de foie gras and bacon. Then I remembered that I don't have a chaise lounge and my wife ate all the bacon.

To demonstrate my Roman cunning, I settled for giving my opponent Al a chair slightly more uncomfortable than my own.  Al brought his brand new Carthaginian army and the question on everybody's lips was, could Monty possibly lose as the Romans?  The fact that everybody asked me this question before the game was not an encouraging sign.  

The initial setup presented me with a problem.  I had a large farm field in the middle of the table to contend with.  Roman legions do poorly in anything but open terrain.  Marching a legion through the farm field would delay my entire line of battle so I decided to deploy my Italian Allies in the center.  Being Medium Foot, my Italian Allies had the ability to move and fight with impunity in uneven terrain like a farm field. Unfortunately, they were also my weakest units.


As I launched a vigorous advance on the Carthaginian line, I had a feeling of disquiet about my center.  I didn't have any reserves or units providing rear support. Then I remembered the Battle of Cannae and how Hannibal purposely put his weakest units in the center of his line.  Worse comes to worse, I could conduct a double envelopment of the Carthaginian center with my strong right and left flanks.  Riiiiight...
Someone get those fellows pants!
Al's center was composed of Gallic foot and elephants and he decided to send them in once I came within charge range, which was just as well as the impetuous Gauls are unlikely to listen to a general's orders to stand fast in the face of the enemy.  My Italian Allies crumpled on impact and crumpled too were my plans to conduct a double envelopment.   I now understand Romans reluctance to grant full citizenship to their Italian Allies in the Republican era.  Nifty shields and great hair but they can't fight worth a darn.

Before
After
With my center evaporated, the battle devolved into a series of small actions.  Al's elephants proved effective against my legions. Against all odds, one battlegroup of fragmented elephants managed to grind down and then break the Hastati to its front.  With that, the battlefield became a chaotic swirl of units ebbing in every direction.  My camp was sacked and enemy roamed with virtual impunity behind my lines.  The battle ground on and on with neither side yielding. Finally, with each side's army a single point away from breaking, one of   Al's units broke and the game was called.
Roman velites tackle the non-business end of the elephants. 
Closest thing to a double development I saw.

Lesson's learned:

1.  Don't put your weakest unit(s) in the center of your battle line.  Put them on the flanks or in reserve where they can't cause too many problems. 
2.  Cretan Archers are expensive but fantastic.  They had a hand in breaking two battlegroups. 
3.  You can only deploy 16 bases of Upgraded Veteran Legionaries in the Mid-Republican Roman list.  Arggg!  Reading fail on my part!  My list had 24, which means the match goes to Al!  

Other matches today included Bruce's Byzantium army versus Clay's Teutonic Knights.  Unfortunately, a flank march with the Knights did not come off properly, contributing to the game going to Byzantium.

Bruce put a brand new Numidian army on the table against Klay's Pontiac army.  I was curious to see how 32 bases of Numidian Light Horse made out.  The short answer was not very well today as Klay had the hot hand and the victory by day's end. 
 
Al tells his dad Brandt that he should have brought Romans. 
Elephants could not save the day for the Numidians. 

Sunday, September 18, 2011

Onward Carthaginian Soldier

Saturday's game featured a Carthaginian versus Roman showdown with each of the 4 players fielding a 650 point army. Battle was fought on a 9' x 4' field.  The terrain set up turned out poorly for the Romans, with their center attracting a gully, open field, village and a plantation. The upside was the Roman village did look awfully nice!

I ran a Later Carthaginian army, loaded with elephants.  My teammate Klay ran Early Carthaginian, loaded with heavy chariots and the Sacred Band. We concentrated our African Spear in the center of the table with orders to hold in place. On our right flank, I planned to push forward and meet the Romans head on. On our left, Klay aimed to swing wide around the Roman flank and bend their line back, hoping to create gaps and opportunities for flank attacks.  The battle was shaping up to be another demonstration of Roman quality versus Carthaginian quantity. 
The early game progressed well for Carthage, with our right and left flanks advancing sharply.   In the center, Mark struggled to move his legions and medium archers up due to the village and gully.  The wall of Carthaginian chariots and cavalry presented the Romans with a challenge. What would they do in the face of Klay's flanking movement?
Two units of my Numidian light horse caught and ran down Roman slingers.  During the pursuit, my Numidians Light Horse discovered Lanciarii in ambush in a plantation.  The Lanciarii charged and succeeded in running down one of my light horse from behind.  In pursuing the broken horse, they  forced my 2nd battlegroup of light horse to evade through my elephants, disrupting them! 
Luck was with me on this day because my Elephants managed to fight the Lanciarii to a draw and then subsequently rally out of disorder.  The Elephants proceeded to win in subsequent turns and broke the Lanciarii, sending them back to join the routed Roman slingers.  While the Lanciarii and Elephants battled it out, two legions advanced into what would turn out to be a trap.  
The Scutarii trap is sprung.  Elephants moving up on the right, Scutarii in the center and just out of sight, another unit of Scutarii coming up on the left.  With only 2 legions to face down enemies on three sides, this did not end well for the Romans.  
Meanwhile, Mark's Romans advanced relentlessly on our wall of African Spear in the center, disregarding our superior numbers.  And for good reason, apparently, as one unit of Spear broke from bowfire alone!  In melee, a legion broke a second unit of Spear and just like that, our center was crumbling and now in doubt. 
On the Carthaginian left flank, nothing went quite like it should have.  Brandt skillfully deployed his legions and countered Klay's every threat. By game's end, my partner had failed to eliminate a single Roman base or break any units. His chariot charges failed as did a charge and melee by the Sacred Band!
At the finish, we scored the Carthaginians as up on the right flank, Romans up in the center and Carthaginians neutralized on the left flank.  The 6 bases of elephants were key on my front.  They are faster than heavy foot and in melee, they neutralized the Roman advantage in armor and superior sword skill.  Then again, its easy to shine when you have the rare fortune of catching your opponent in the flank.  

This is as good a point as any to rest my Carthaginian army. I have 3 other armies to play, one of which has never seen the tabletop. I'm planning to fast forward 1700 years and run my Later Ottoman Turks at our next meet.  After getting slapped around by Roman Medium bowmen, I'm looking forward to running my Janissary Medium bowmen. 


Saturday, September 3, 2011

The Battle of Chevellu Pass

Last night, we tested a scenario Clay designed based on Hannibal's descent from the Alps and the Allobroges Tribe's ambush. The scenario was built for fun and to that end, it was a smashing success! The battle featured 3 commands-Carthaginian 650 pt. army with Hannibal + 2 sub generals and his Spanish Ally 650 pts. + 2 generals.  Against them was a 1,100 Gallic army + 3 generals and a Spanish contingent.  To simulate the difficulty of an Alps descent, all hills were Steep Hills except where the Gauls had their camp.  The center of the board was dominated by 2 impassible mountains, edged with steep hills and forest. The Carthaginians and their Spanish ally each had a Mob that represented baggage trains with a movement rate of 3".  If the baggage train was touched by the Gauls, it was sacked and points given to the Gauls.  The challenge for Hannibal was to get the 2 baggage trains through the difficult terrain loaded with ambushes and off the board for points.  The challenge for the Gauls was to slow down/stop a larger Carthaginian army and sack the baggage trains.  The table was 9' by 4'.  Clay will present the Gallic point of view and I'll report for Carthage. This was my first time photographing a match after dark and the photos are not great.  I hope that doesn't detract too much from the overall narrative. I'll order a tripod, read some tutorials and employ the steps necessary to achieve better results in  the future.   

Carthage:  My partner and I split the board.  The terrain left of center made the large board feel claustrophobic and the map was littered with ambush markers.  I took Hannibal and the Carthaginians.  I estimated I had little chance of forcing the center so I only posted 2 battlegroups of African Spear and a group of skirmishers for the task.  I deployed my baggage train so it could follow the Spanish advance to my right or up the road if I were fortunate enough to force the gap.  I posted most of my troops on the left flank, which had a gap between the forest and the steep hill that anchored the Gallic flank. I hoped to knock down the Gallic line and swing around his flank.  Deployment is key  and my deployment on the left flank sowed the seeds of my difficulties.  My Spanish partner deployed his Scutarii Heavy Foot in a double battle line.  Since Spanish foot is all average, he was counting on rear support to win him the day.

Gaul: Late yesterday we could see the clouds of dust on the horizon signaling the arrival of the Carthage-Celtiberian invaders.  Before dawn, I ordered our Iberian Spanish ally to the forests along the mountain passes setting up numerous ambushes-in all 4 Scutarii battlegroups and one Catraetti battlegroup hunkered down in the steep hills and woodlands in the expected path of the enemy.  Our camp was behind a large gentle hill that looked out over the open valley on one side and the mountain pass road on the other. The hill would be the perfect location from which to fend off the Celties or the Hannibalites that make it thru the pass. All roads to Rome pass right by my Hillcamp!  The hill defense will include 3 battlegoups of warriors, 2 BGs of light troops, some chariots and my heavy cav...and of course the women and children will guard the camp itself!  To my right, I have 3 BGs of warriors including the Elite Soldurii, plus the 4 BG of ambushers guarding the pass itself plus the woodlands along the Carthaginian approach.  Finally, to seal the deal, I will send my eldest son, Vignor, to outlflank the Celties with cavalry and chariots...ohh it will be such a joy to watch as Vignor rolls into the flank of the invaders, while i enjoy a glass of mead on the hilltop!
Ambush Alley
How do Elephants and Cavalry mix? Right, they don't
Spanish advance reveals...more Spanish!
Carthage: The early going saw us move up cautiously and uncovering ambushes.   I only had one unit of Medium Foot and my Heavy Foot Offensive Spear turned out to be useless in difficult terrain. The Gauls had a flank march under way that kept us on our toes as we advanced.

Gaul:  The Carthaginians are stumbling into the Scutarii at every turn!  And they are marching the Carthage spearmen right into the mountain pass!  Meanwhile Hannibal is in the Carthage rear, harrying women and children to get the baggage and rush to the mountain pass.  All is going according to plan, except our Iberian light troops got too cute and were caught in the rear by a Carthage light, leading to a quick demise.  On my left, the Celtiberians continue a slow plod up the meadow passes, and have sprung yet another ambush-this time his light troops revealed a Scutarii, who will stand steady in the forest awaiting the real enemy-the Celtiberian heavies. Fortunately son Vignor is wise enough to hold off on his outflanking move...the trap is yet to be sprung. Ahhh, the mead is strong and the view is spectacular!
Peek a boo!
My only Mediums rout in 1 turn and disrupt 3 units in the process. Ugh!
The Spanish make it look easy.  Nice lines, nice advance. 
Carthage:  Against long odds, my advance up the pass in the mountains succeeds.  I charged a line of skirmishers and caught them!  When the skirmishers routed, we pursued and caught them again, getting us through the gap.  My 2nd unit of African Spearmen would not prove so lucky. They deployed, tried to catch the ambushing Scutarii in the flank and failed.  In face to face melee in the difficult terrain, my Spearmen broke.  Meanwhile, Hannibal was overseeing the baggage train and its double moves.  I should have had him out on my left flank and not fooling around with mules and wagons.  On my left, disaster strikes when my only Medium Foot is charged and routed in one turn! This disrupt 3 nearby units and forces my Elephants to pivot in place and out of line.  My commanders had to bolster my disrupted units while the Gallic commanders led charge after charge from the front.

Gaul:  Reports from my right flank, where the Soldurii fend off Numidian horse and the Scutarii are crashing out of the woods onto the flanks of the enemy, couldn't be better.  I send back a message to move the warriors forward to aid the Scutarii, and trap the elephants.  But I also hear disturbing news that a battlegroup of Carthage spear has made it thru the pass...how can this be?  Offensive spear, fighting in a state of disorder, uphill, is no match for our nimble and fearsome Scutarii-they will certainly win the day!  Now on our left, I must say that Vignor is taking his sweet time. I would have crashed into the side of the light cavalry trying to flank us up here on the hill...that opportunity is long past but certainly he will come to battle now, as the main army exposes its flank. Oh that Eldest son of mine is wise, but perhaps a might bit slow, I'll send out my own cavalry and chariots just to pin the Celties long enough for Vignor to get involved. I shouldn't have to do this but it is Vignor's first time on an outflank move, so I can help make his first time a success.
The Spanish tide rolls forward

Carthage:  At this point of the game, I had to pass a Complex Movement Test to not consume more beer.  Beer dulls the pain of failure but it also dulls the mind. The left flank came undone after I lost a leader in melee and that morale checks undid what was left of my front.


Gaul: WHERE IS VIGNOR?!!  My chariots are battling on and on, my heavy cavalry fall back in anticipation of the flank move, the Scutarii ambushers have calmly waited in the mountain forest under a constant barrage of missiles, and now falter, the Mead is warming, the women are starting to smell in the hot sun...WHERE IS THAT HALFWIT KID OF MINE!  The messenger from the right flank indicates the Carthaginian invaders are all but routed...Two BGs of elephants, a BG of Celtiberian warriors, and a cavalry unit are all in full rout, and we haven't even brought the Soldurii to bare yet!  But wait, what's this?  The Scutarii guarding the mountain pass, uphill, in the woods, have fallen to a BG of African Spearmen?  IMPOSSIBLE!
Spanish success!
Success!
Carthage:  With the pizza gone and the beer supply looted, we call it a night.  Taking stock, the Carthaginian left is in ruins.  The Gallic center is cleared, allowing a baggage train to exit the board.  The Spanish have cut a path to the road to exit their baggage train as well.  Clay commented that with our Friday night game, beer and pizza, it felt like we were back in college.  That is the mark of a great night!

Gaul: VIGNOR YOU IDIOT!  NOW you arrive!  The battle has been decided you FOOL!  Darkness is here and Hannibal is marching his baggage train thru the pass.  I gave the Kid EVERY opportunity...I  put up flagging to lead him to the field; I gave him fast reliable troops and yet he couldn't find his backside with two hands!  Blahh!  Well we sent much of the Carthaginians packing and should do some serious damage to the Celtiberians as they attempt to take this hill...but in the end it appears the baggage will get thru, and I will have to retire from the field; we have dealt a serious blow to Hannibal, but he will make it thru our lands with some of his army intact....alright, where is the Halfwit son of mine?!

In hindsight, I overpowered my right flank. My Soldurii never saw combat, and one Scutarii didn't either. I dearly needed these troops in the center; or closer to my camp.  While I defeated the Carthaginian left, it wasn't tied to the primary objectives, so this was a big mistake.  I was too weak in my center and left. Even if Vignor the halfwit showed up with his +2 bonus flank move, he might not have had enough power to carry the day, not without me stepping forward OFF my wonderful hill.  A couple of troops stripped off my right might have really made the day.  Goes to show, the setup is often the most important part of the game. As it was we have great battles, and everyone had some success.  Fun fun!